Logging on for the first time
When you log on to WebHost Manager for the first time you need to set up the basic settings on your server. After you have completed these initial steps you can log into WebHost Manager normally - refer to Logging on for more information.
Note: You can change your initial server settings at any time - refer to Editing your server setup for more information.
To log on:
Enter the address of your WebHost Manager in your web browser. The address needs to be in the form of http://www.yourdomain.com:2086/ or https://www.yourdomain.com:2087/.
Enter your user name and password in the User Name and Password fields.
Click on OK button.
Click on the Next button in the first page.
Read the legal agreement and click on the I Agree or I Disagree button.
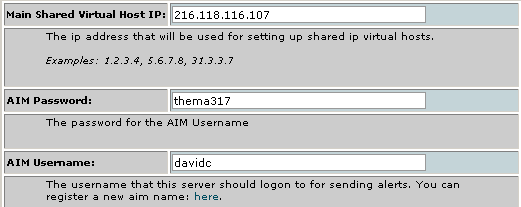
Enter the primary IP address, BIND version, and IP address of the master cluster server (optional) in the Primary IP Address, BIND Version, and Master Cluster Server fields.
Enter your administrator's contact details in the Server Contact's AIM (AOL Instant Messenger), Server Contact's E-Mail Address, and Server Contact's Pager Address fields.
Note: Entering ICQ contact details in the available field does not currently work due to changes in the ICQ protocol.
Enter the name of the default CPanel theme that you want to use in the Default CPanel4 Theme field. The two standard themes that are automatically installed with CPanel are default and iconic. Refer to Themes for more information about themes.
Enter the default home directory where new users accounts will be created and the prefix that matches other user partitions in the Default Home Directory and Home Directory Prefix fields.
Enter the current hostname of your server in the Hostname field.
Enter the name of the type of Apache logs that you want to receive. Two options are available:
combined - All information is logged, including referrers, user agents, and requested files.
access - Only information about requested files is logged.
Enter up to four nameserver names in the Primary Nameserver, Secondary Nameserver, Third Nameserver, or Fourth Nameserver fields. The Primary Nameserver and Secondary Nameserver fields are mandatory.
Choose whether you want users to have CGI access in the CGI Script Alias field. y = Yes, n = no.
Enter the IP address of the master nameserver in the Master Nameserver field, if required.
Warning: This will turn your server into a slave server if this option is enabled. It is advisable to establish a key rust relationship with the master nameserver after enabling this option - refer to Establishing a trust relationship for more information.
Click on the Save button.

Click on the Finish button.
Click on the Continue button.
